Castlevania: Lords of Shadow Gameplay / Walkthrough w/ SSoHPKC Part 13 - More Titans
Castlevania: Lords of Shadow 2 Gameplay Walkthrough w/ SSoHPKC Part 13 - The Guillotine
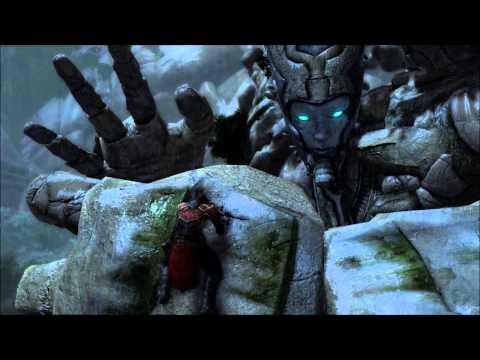
Castlevania: Lords of Shadow Gameplay / Walkthrough w/ SSoHPKC Part 14 - Black Knight Golem
Castlevania: Lords of Shadow Gameplay / Walkthrough w/ SSoHPKC Part 12 - Lazers
Castlevania: Lords of Shadow Gameplay / Walkthrough w/ SSoHPKC Part 39 - Scary Scarecrows
Fable Anniversary Gameplay / Walkthrough w/ SSoHPKC Part 13 - The Treasure
Castlevania: Lords of Shadow Gameplay / Walkthrough w/ SSoHPKC Part 15 - Puzzle of All Puzzles
Castlevania Lords of Shadow 2 Revelations Gameplay Walkthrough Part 13 - 100%
Castlevania: Lords of Shadow Gameplay / Walkthrough w/ SSoHPKC Part 38 - The Pretty Witch
Castlevania: Lords of Shadow Gameplay / Walkthrough w/ SSoHPKC Part 17 - Freedom Eagle
Castlevania: Lords of Shadow 2 Gameplay Walkthrough w/ SSoHPKC Part 14 - On the Hunt for Health
Castlevania: Lords of Shadow - Ultimate Edition (PC) Part 13 "Chapter 2: Sanctuary of Titans"
Castlevania: Lords of Shadow Gameplay / Walkthrough w/ SSoHPKC Part 16 - Mallet Bro
Castlevania Lords of Shadow Gameplay Walkthrough Part 13 - Chapter 12 - Ending
Castlevania: Lords of Shadow Gameplay / Walkthrough w/ SSoHPKC Part 40 - Music Box of Death
Castlevania: Lords of Shadow Gameplay / Walkthrough w/ SSoHPKC Part 11 - Crystal Shards
Castlevania: Lords of Shadow 2 Gameplay Walkthrough w/ SSoHPKC Part 12 - Back to the Streets
Castlevania: Lords of Shadow Gameplay / Walkthrough w/ SSoHPKC Part 7 - Spiked Chain
Castlevania: Lords of Shadow Gameplay / Walkthrough w/ SSoHPKC Part 8 - Death by Hug
Castlevania: Lords of Shadow Gameplay / Walkthrough w/ SSoHPKC Part 6 - Is This Death?